
Configuration
Configuring your Wicket application settings and deployment options
In this chapter we will see a classic Hello World! example implemented using a Wicket page with a built-in component called Label (the code is from the HelloWorldExample project). Since this is the first example of the guide, before looking at Java code we will go through the common artifacts needed to build a Wicket application from scratch.
[!NOTE] All the example projects presented in this document have been generated using Maven and the utility page at http://wicket.apache.org/start/quickstart.html . Appendix A contains the instructions needed to use these projects and build a quickstart application using Apache Maven. All the artifacts used in the next example (files web.xml, HomePage.class and HomePage.html) are automatically generated by Maven.
Wicket application structure
A Wicket application is a standard Jakarta EE web application, hence it is deployed through a web.xml file placed inside folder WEB-INF:
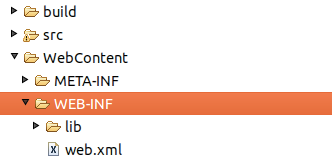
Illustration: The standard directory structure of a Wicket application
The content of web.xml declares a servlet filter (class org.apache.wicket.protocol.http.WicketFilter) which dispatches web requests to our Wicket application:
<?xml version="1.0" encoding="UTF-8"?>
<web-app>
    <display-name>Wicket Test</display-name>
    <filter>
        <filter-name>TestApplication</filter-name>
        <filter-class>org.apache.wicket.protocol.http.WicketFilter</filter-class>
        <init-param>
          <param-name>applicationClassName</param-name>
          <param-value>org.wicketTutorial.WicketApplication</param-value>
        </init-param>
    </filter>
    <filter-mapping>
        <filter-name>TestApplication</filter-name>
        <url-pattern>/*</url-pattern>
    </filter-mapping>
</web-app>
Since this is a standard servlet filter we must map it to a specific set of URLs through the <filter-mapping> tag). In the xml above we have mapped every URL to our Wicket filter.
Using Jakarta Servlet annotations, we can use a class in place of web.xml to configure our application. The following example uses annotation WebFilter.
@WebFilter(value = "/*", initParams = {
             @WebInitParam(name = "applicationClassName", value = "com.mycompany.WicketApplication"),
            @WebInitParam(name="filterMappingUrlPattern", value="/*") })
public class ProjectFilter extends WicketFilter {

}
[!NOTE] Wicket can be started in two modes named respectively DEVELOPMENT and DEPLOYMENT. The first mode activates some extra features which help application development, like resources monitoring and reloading, full stack trace rendering of exceptions, an AJAX debugger window, etc… The DEPLOYMENT mode turns off all these features optimizing performances and resource consumption. In our example projects we will use the default mode which is DEVELOPMENT. Chapter 24.1 contains the chapter “Switching Wicket to DEPLOYMENT mode“ where we can find further details about these two modes as well as the possible ways we have to set the desired one. In any case, DO NOT deploy your applications in a production environment without switching to DEPLOYMENT mode!
The application class
If we look back at web.xml we can see that we have provided the Wicket filter with a parameter called applicationClassName. This value must be the fully qualified class name of a subclass of org.apache.wicket.Application. This subclass represents our web application built upon Wicket and it’s responsible for configuring it when the server is starting up. Most of the times our custom application class won’t inherit directly from class Application, but rather from class org.apache.wicket.protocol.http.WebApplication which provides a closer integration with servlet infrastructure. Class Application comes with a set of configuration methods that we can override to customize our application’s settings. One of these methods is getHomePage() that must be overridden as it is declared abstract:
public abstract Class<? extends Page> getHomePage()
As you may guess from its name, this method specifies which page to use as a homepage for our application. Another important method is init():
protected void init()
This method is called when our application is loaded by the web server (Tomcat, Jetty, etc…) and is the ideal place to put our configuration code. The Application class exposes its settings grouping them into interfaces (you can find them in package org.apache.wicket.settings). We can access these interfaces through getter methods, which will be gradually introduced in the next chapters when covering related settings.
The current application’s instance can be retrieved at any time by calling static method Application.get() in our code. We will give more details about this method in chapter 9.3. The content of the application class from the HelloWorldExample project is the following:
public class WicketApplication extends WebApplication
{
    @Override
    public Class<? extends WebPage> getHomePage()
    {
        return HomePage.class;
    }

    @Override
    public void init()
    {
        super.init();
        // add your configuration here
    }
}
Since this is a very basic example of a Wicket application, we don’t need to specify anything inside the init method. The home page of the application is the HomePage class. In the next paragraph we will see how this page is implemented and what conventions we have to follow to create a page in Wicket.
[!NOTE] Declaring a WicketFilter inside web.xml descriptor is not the only way we have to kick-start our application. If we prefer to use a servlet instead of a filter, we can use class org.apache.wicket.protocol.http.WicketServlet. See the JavaDoc for further details.